¶ Laser Area
Laser training is available on at regularly scheduled times. To sign up for training go to this Google Sheet.
¶ Overview
Fast, precise, and endlessly satisfying — the laser cutter can bring your designs to life in wood, acrylic, leather, and more. Engrave your artwork, build intricate models, or fabricate custom parts in minutes. Once you start laser cutting, you’ll wonder how you ever made things without it.
¶ Safety
¶ Fire
- Small fire (e.g. a lit match or candle) » Try to put out the flame (blowing or smothering)
- Significant Fire » Hit EMERGENCY STOP » Use CO2 extinguisher (located beside the laser)
¶ Fire Procedure
- If fire cannot be controlled » Hit Emergency Stop + evacuate building immediately
- Alert others: nearby areas (esp. metal shop), people on your way out & yell “FIRE”
- Call 911 once safely outside
- Assign someone to notify downstairs businesses
- Wait for Fire Dept to arrive
¶ Flames During Cutting
- Small, brief flames = normal (material dependent)
- Check Air Assist (air from nozzle) is operational before proceeding with your cut
- If flames reach nozzle » stop, tag “Out of Order,” and use another laser
- If flame continues after cut » this is a fire! » follow fire procedure above
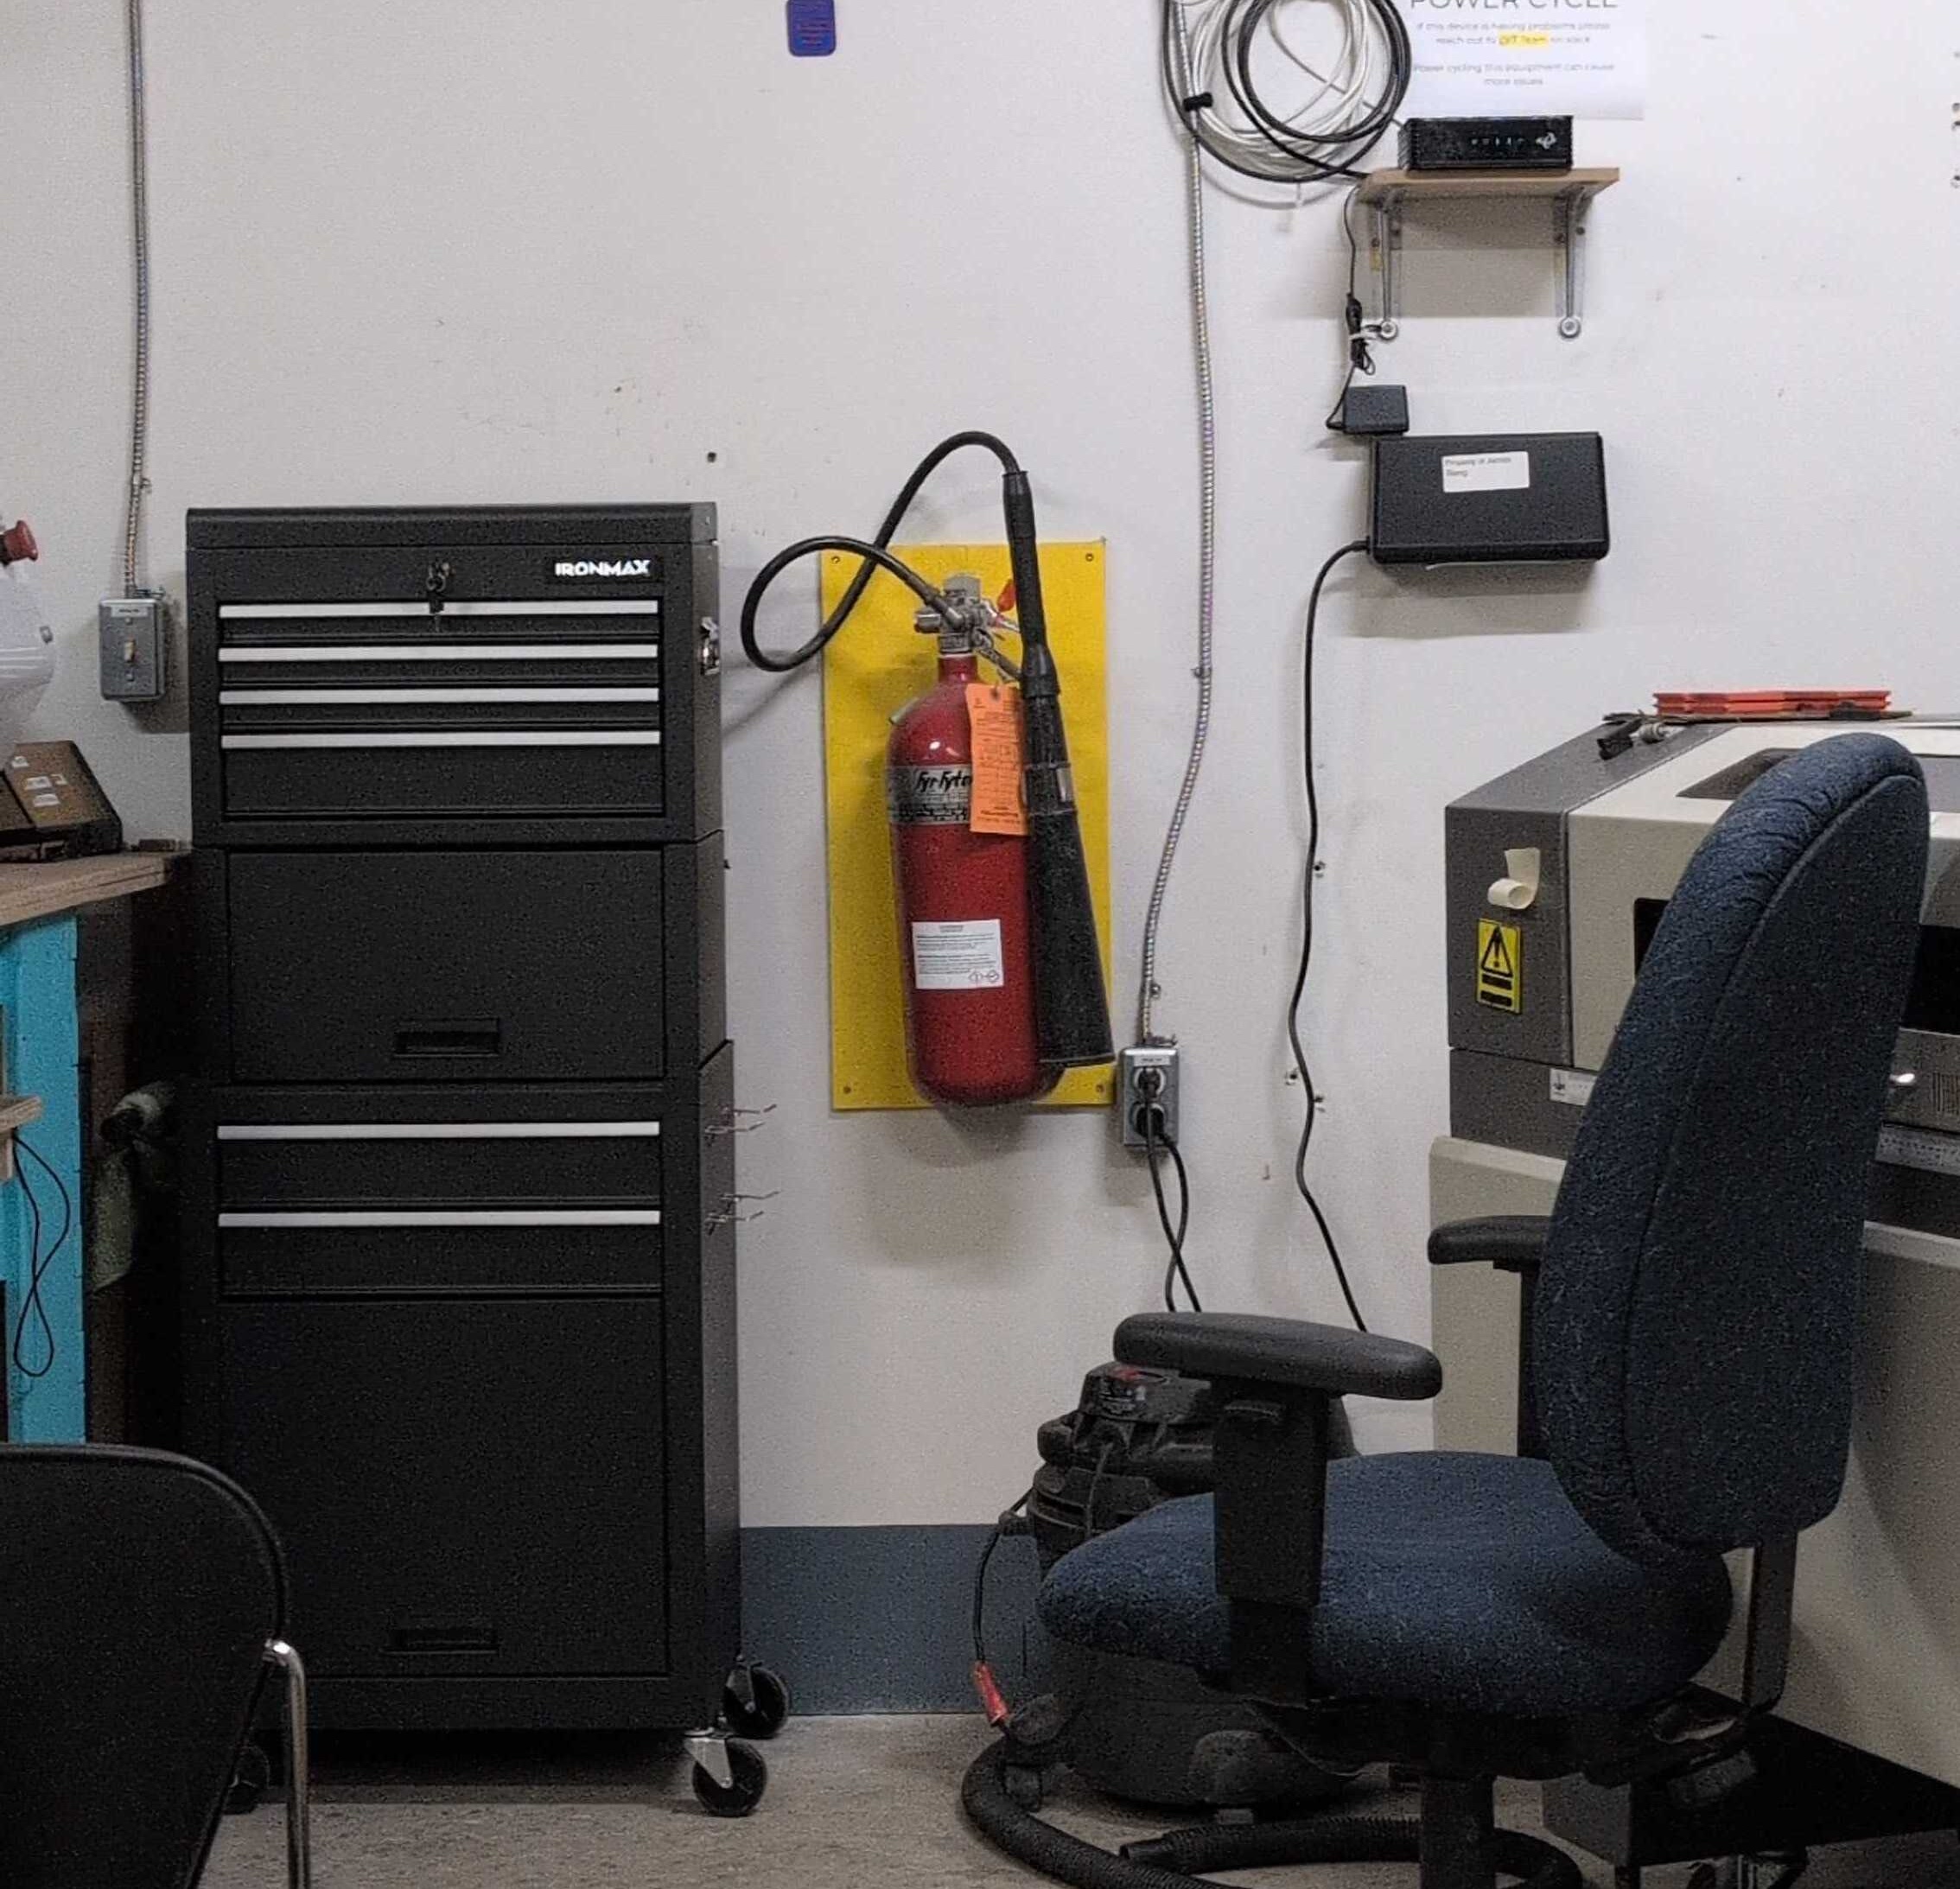
¶ Fire Extinguisher
- There are two fire extinguishers in the laser area. They are not your usual fire extinguisher. They are CO2 fire extinguishers so they use carbon dioxide to put the fire out. These are a lot less messy than your conventional fire extinguishers
- There is one located to the left of the big laser (see picture below), as well as one on the outside (near the metal shop) of the big table where the main laser computer is located
¶ Training
¶ Training Documentation
The most up-to-date laser training documentation is on Google Drive.
Laser training is available on at regularly scheduled times. To sign up for training go to this Google Sheet.
¶ Lightburn License
Lightburn's business model allows users to pay once and get updates for a year, then continue using that software (without further updates) for as long as they wish. For this reason, the copy of Lightburn on the laser cutter computer is frozen at 1.0.06. Lightburn has provided us with a discount code for our members to purchase a limited version of the software, please contact the the laser team/trainers to get the code. More information on Lightburn licenses here.
¶ Laser Cutting Resources
Boxes.py: https://www.festi.info/boxes.py/ provides configurable boxes, shelves, drawer insert, and more, and outputs laser-appropriate files to use.
Live Hinges: there is a resource file on Google Drive containing examples of various live hinges possible with a laser cutter.
Nesting: https://deepnest.io/ provides open-source nesting software for optimized part layouts.
Sample Power and Speed Settings: https://www.cs.cmu.edu/afs/cs/academic/class/99353-f16/speedsfeeds_RL.pdf/ can be used as a guide to get you started for your projects, it's always good to do a small test cut first to see if the settings you're using are right for your project.
¶ Software
- List any software that exists for tools in this area
- Do we need to renew that software ever?
¶ Area Rules
NEVER LEAVE LASER UNATTENDED while in use
Small fire » Try to put out the flame (blowing or smothering) Significant Fire » Hit EMERGENCY STOP » Use CO2 extinguisher
If you are unable to control the fire, hit the emergency stop and leave the building immediately. Yell fire as loudly as possible on your way out of the building. Call 911 as soon as you are safely outside the building.
Small, brief flames can be normal depending on the material. Before continuing confirm Air Assist is working. If flames are large enough to reach the nozzle, stop immediately, tag ‘Out of Order,’ and use another laser. If the flame persists after the laser is finished cutting, this is NOT normal and is considered a fire, follow the steps above for putting out fires.
BEFORE CUTTING Check bed is clear of debris, tape, or magnets FOB to start laser Ensure: Cooler is at 19–25°C, exhaust is running, air assist is ON
DURING CUTTING Laser cutters are only allowed to be used for the cutting or engraving of approved materials Lid must remain closed while cutting Always use the height adjustment tool to set the height of the focus tube Report malfunctions, damage, or non-working parts (Slack - #area-laser + Out of Order tag) First-come, first-serve (notify if >2 hrs in Slack - #area-laser) AFTER CUTTING Vacuum any tiny scraps, ensure laser is clean of materials Exit software Press STOP on laser (Laser will go into 5 minute cool down mode)
LASER AREA COMPUTER For laser use only Log out / Incognito mode Use Shared Folder on desktop for transferring or storing files (accessible from your Kwartzlab Gmail account - Google Drive > Shared Drives (on left) > Shared > [Your Name]
LASER AREA STORAGE Label with name + date it was placed in storage (Max 6 months in laser storage) Only full sheets that are immediately needed for an active project
¶ Laser Etiquette
Use of the laser is first-come, first-serve. If you are going to be on the laser for a long time (2 hours or more), please notify other members via Slack in #area-laser. Kwartzlab members have been great at being flexible with use of the laser, often letting others jump in between cuts/engraves if someone has a small job to perform.
Let’s keep this going!
¶ Laserable Materials
Flat materials are ideal and strongly recommended Max size is approx. 600 x 900 mm or 2’ x 3’
Do not cut or etch/engrave any material that might have chlorine. You can check by heating a copper wire in a flame, touching the material, and then reheating the copper wire. If the flame emits a green colour then there is chlorine in the material. See Beilstein Test and a video demonstration.
¶ APPROVED MATERIALS
- Solid wood (thickness varies depending on species)
- Plywood
- MDF
- Hardboard
- Acrylic (PMMA): Extruded and cast (both allowed)
- Fabric
- Felt
- Leather
- Paper/Cardboard/bristol board/and other paper based products
- Stamp materials (specifically designed for laser cutters)
- Foam-core (high fire risk, don’t take your eyes off it for a moment)
- Foam (test for chlorine before cutting)
- Rubber (test for chlorine before cutting)
¶ MATERIALS THAT CAN ONLY BE ENGRAVED OR ETCHED:
- Glass
- Anodized aluminum (the laser ablates the anodized outer layer)
- Painted metal - The paint is removed, but the metal is unaffected
¶ MATERIALS THAT ARE NOT ALLOWED
- Anything containing chlorine
- ABS plastic (It doesn’t cut well, makes a mess, and smells very bad)
- Ceramic tile
- Polycarbonate
- PVC plastic
- Electrical tape
- Vinyl records
- Food
- Humans, whole or in part
- Slate and some other types of stone
¶ Where to purchase Laser Materials
¶ Kwartzlab Laser Shop
Coming soon
¶ Other Suppliers
| Material | Location |
|---|---|
| Hardboard (1/8" and 1/4") |
|
| MDF (1/8" and 1/4") |
|
| Acrylic (1/8" and 1/4") |
|
| Laserply (1/8" only) |
|
| Plywood (1/8" and 1/4") |
|
¶ Maintenance
¶ Daily
- General tidying of the area
- Tool downtime: None
¶ Weekly
- Wipe down interior and exterior of laser
- Remove honeycomb and vacuum/pickup all of the debris that has fallen through
- Clean the mirrors
- Double check alignment
- Wipe the laser desk down
- Straighten up the tools on the laser desk
- Clean up downloaded files on laser computer
- Tool downtime: 1 hour
¶ Monthly
- Remove and soak the honeycombs (see guide for details)
- Deep clean the inside and outside of the laser
- Cleaning the soot and debris from the extraction fan
- Grease the rails
- Perform an inspection to look for loose parts, broken parts, etc.
- Tool downtime: 2-3 hours
¶ Maintenance Materials
- 2” thick masking tape
- Lint-free cleaning swabs
- Isopropyl alcohol
- Blue paper towels
- Grease for rails
- Extra mirrors and lenses
¶ Notes relating to the laser cutter hardware
- Vent/filter/honeycomb bed: Do not expect that the vent/filter on the bed of the laser cutter is squared to anything. This vent/filter is moveable and requires regular cleaning. If there are lots of little bits in the vent/filter, then clean it up by using the brushes in the computer station. If necessary, use the assigned vacuum and lift the vent/filter to vacuum the dust.
- The cutting bed is 600mm by 900mm
- The blower/fan above the laser has an intake grate that becomes clogged over time. If you notice a smoke buildup in the laser during operation, it is likely due to this grate clogging. Please notify the laser team if this is occurring. If you feel comfortable, the process for cleaning the grate with a vacuum is posted on the wall next to the duct leading to the blower
- There is a white box in-line with the ducting to the exhaust blower. This was from an attempt to filter the exhaust before sending it out into the wide world, but the number of filters we were going through was unsustainable
- There is a simple pressure indicator (a liquid column manometer) installed on the filter box. When the blower is off, the liquid in the two sides of the tube should be level. When the blower is running, there should a difference of a couple inches
¶ Consumables and Small Tools
- There is green tape available for use in the laser area (post on slack if we run out)
- There are pencils, notepads, scissors, an exacto knife set, rulers, an awl (great for punching out tiny pieces that didn't fall out after cutting), measuring tapes, and more. Please put these items back when you are finished
- There are also magnets available for holding down your work piece. We've switched to the red magnets which have different lips for different sized materials Please keep these on the piece of cardboard, they are quite strong and if they get attached to the case of the laser it can be very challenging to get them off
- There are also usually lots of scrap materials beside the laser, or over in the free shelf in the laser storage area. Feel free to help yourself to these materials. If you are unsure if something is free please ask on slack on the #area-laser channel
- Link to the consumables policy page
¶ List of major tools
- G Weike Laser Cutter - this is our main large laser
- Makos - there are 3 Makos lasers, a large one, a small one (best for engraving), and the one on the end has the rotary attachment for lasering tubular objects.